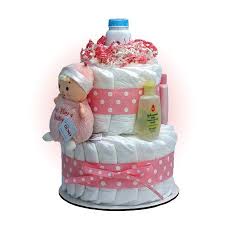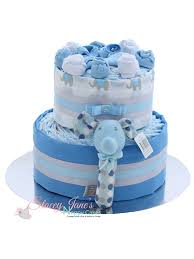
Finding a gift for a baby shower can be a challenge for those who want to give something special that will be remembered. A diaper cake is a festive (and useful) way to turn simple blankets and toys into something magical. Diaper cakes combine the practical with the unexpected, and they’re surprisingly easy to make. The mother-to-be will laugh, and you’ll give her something that she’ll treasure and use for months to come. Diapers.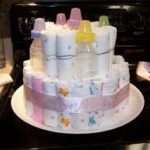
Today I’m gonna walk you through how to make a diaper cake, then all you have to do is decorate with your favorite baby stuff.
Choose size 2 diapers for your cake, since many babies never wear the newborn size, and they grow out of the size 1s astoundingly quickly. Make your cake colorful by picking washcloths and blankets in different shades and patterns. Use a special toy or stuffed animal as a cake topper. You can also use rattles, teething rings, bottles of shampoo or baby oil to jazz up the cake decorations.
ref 1 http://www.creative-baby-shower-ideas.com/diaper-cake-instructions-1.html
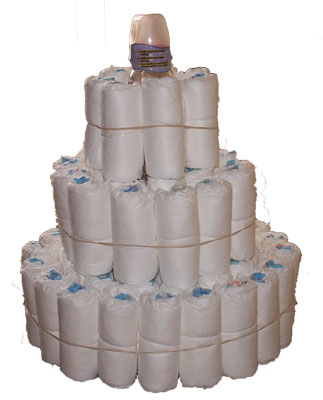
What you’ll need to make a three-tiered diaper cake:
- One package of diapers (size 1 or 2), 56-78 diapers
- Clear hair rubber bands
- Large rubber bands (to tie the diaper rings together)
- Base: a cake plate or platter
- Two 8 oz. baby bottles
- Scissors
- Double-sided tape
- Ribbon-wide enough to cover the rubber bands
- Baby items and toys to decorate it with
Diaper Cake Instructions
So, you have all your ingredients. Now comes time to “make” the cake.
1. Roll the individual diapers. Starting from the outside tip of the diaper, roll inward. Once in a tight roll, secure it with a clear rubber band. Repeat this for all diapers.
2. To start the bottom tier, place a bottle in the center of the cake round/platter. Take a large rubber band and slide it around the bottle. Then, take the rolled diapers, one by one, and insert them inside the rubber band. The rubber band will keep the diapers in place as you build the ring. Slide diapers around the bottle until they meet. The first ring will take about 7-8 diapers.
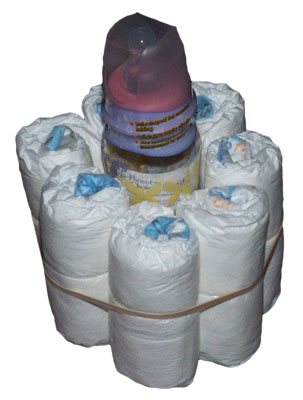
3. The bottom layer will have a total of 3 rings around the center. Add a rubber band and continue sliding diapers to make the final 2 rings for this layer.
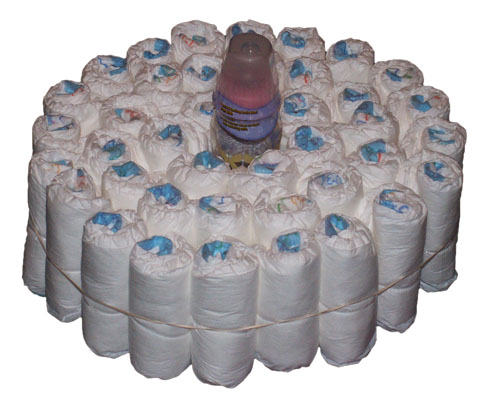
4. The second layer will build upon the bottom layer. Add a rubber band around the top of the bottle and fill with diapers. This will connect and stabilize the diaper cake.
The second layer will have a total of 2 rings around the bottle. This is how it will look once you complete the bottom 2 layers.
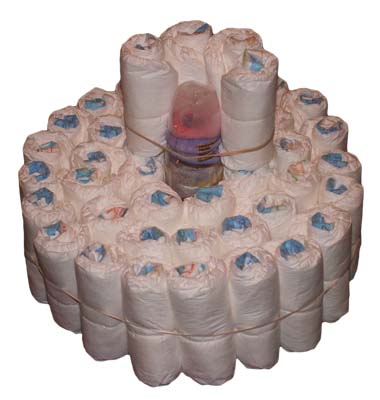
5. There will be a space above the top of the bottle once you complete the second tier. Insert a second bottle inside of Tier 2. This will leave half the bottle left to cover.
The top tier will go around the bottle. There will only be one ring of diapers on the top tier.
Now For The Fun Part…Let’s Decorate!

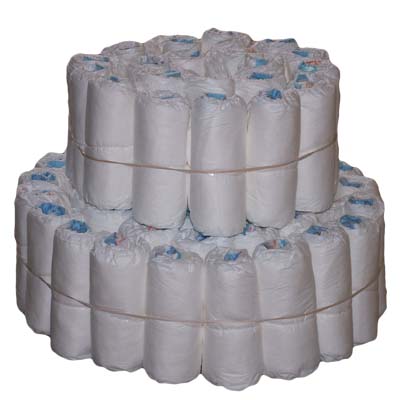
Diaper Cake Instructions for the Cake Above
- Wrap pretty ribbon around each tier to cover the rubber bands. Use double-sided tape to secure the ends.
- Insert the smaller flowers into the center of each diaper top. This will create a lovely border.
- To make a bouquet of flowers on the top, remove the top of the baby bottle. Arrange silk flowers as a bouquet inside the open baby bottle. Attach matching curling ribbon on toothpicks to add some fullness to the bouquet. And you’re done!